
Progress overview
Return to one dashboard for declared services, recent tests, open work, and progress read from Spec Kit tasks.
OPENBUILDROOM DESKTOP · YOUR LOCAL PRODUCT WORKSPACE
See the plan. Run the app. Check the tests. Know what’s happening as your product grows.
Intent, priorities, and outcome stay beside the work.
So a product owner and a new developer can find their way back in.
Completing a useful project handoff each week
Requests and decisions stored with the repository.
PV-024 · Inspect failed test outputOpenBuildRoom reads the standard Spec Kit files.
FR-004 Customers can review the order before paying.
SC-002 Checkout can be completed without help.
Services and dependencies, one click from their output.
Run a configured suite and inspect the result.
2 checks need attention
› Last run completed with 2 failing checks
An interactive example project. Buttons on this page simulate actions; the desktop app operates your real local repository.
THE DESKTOP APP · REAL LOCAL PROJECT
The interactive scene above shows the idea. These are screenshots from the actual Mac app running its included Hello Workspace example: one service started, tests passed, JSON data inspected, and a Spec Kit feature linked to the evidence.
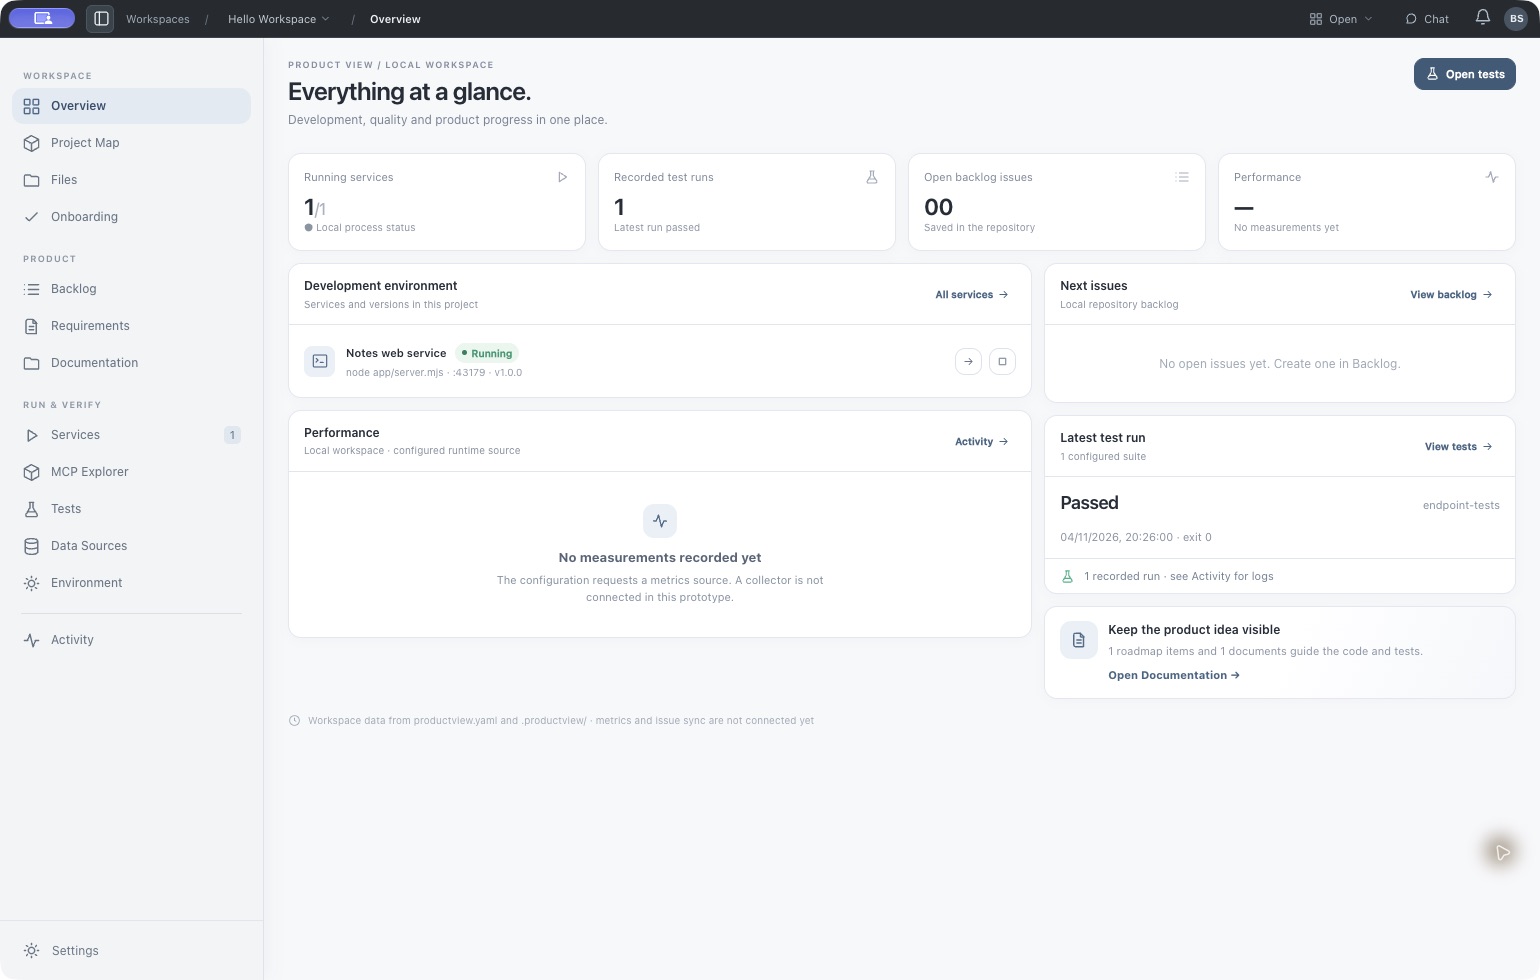
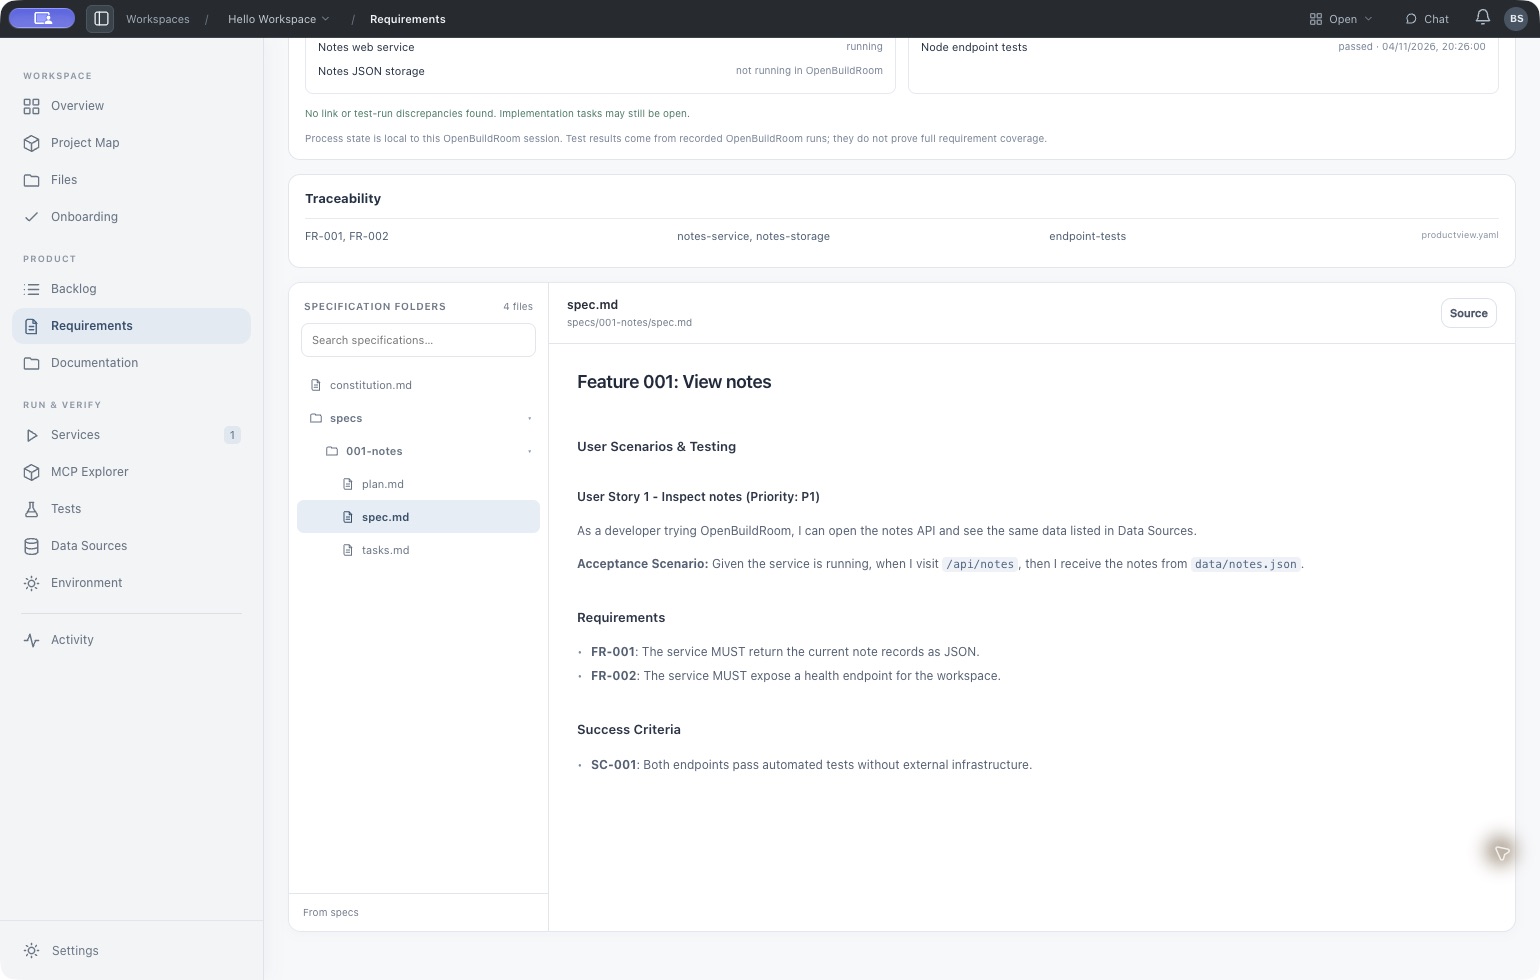
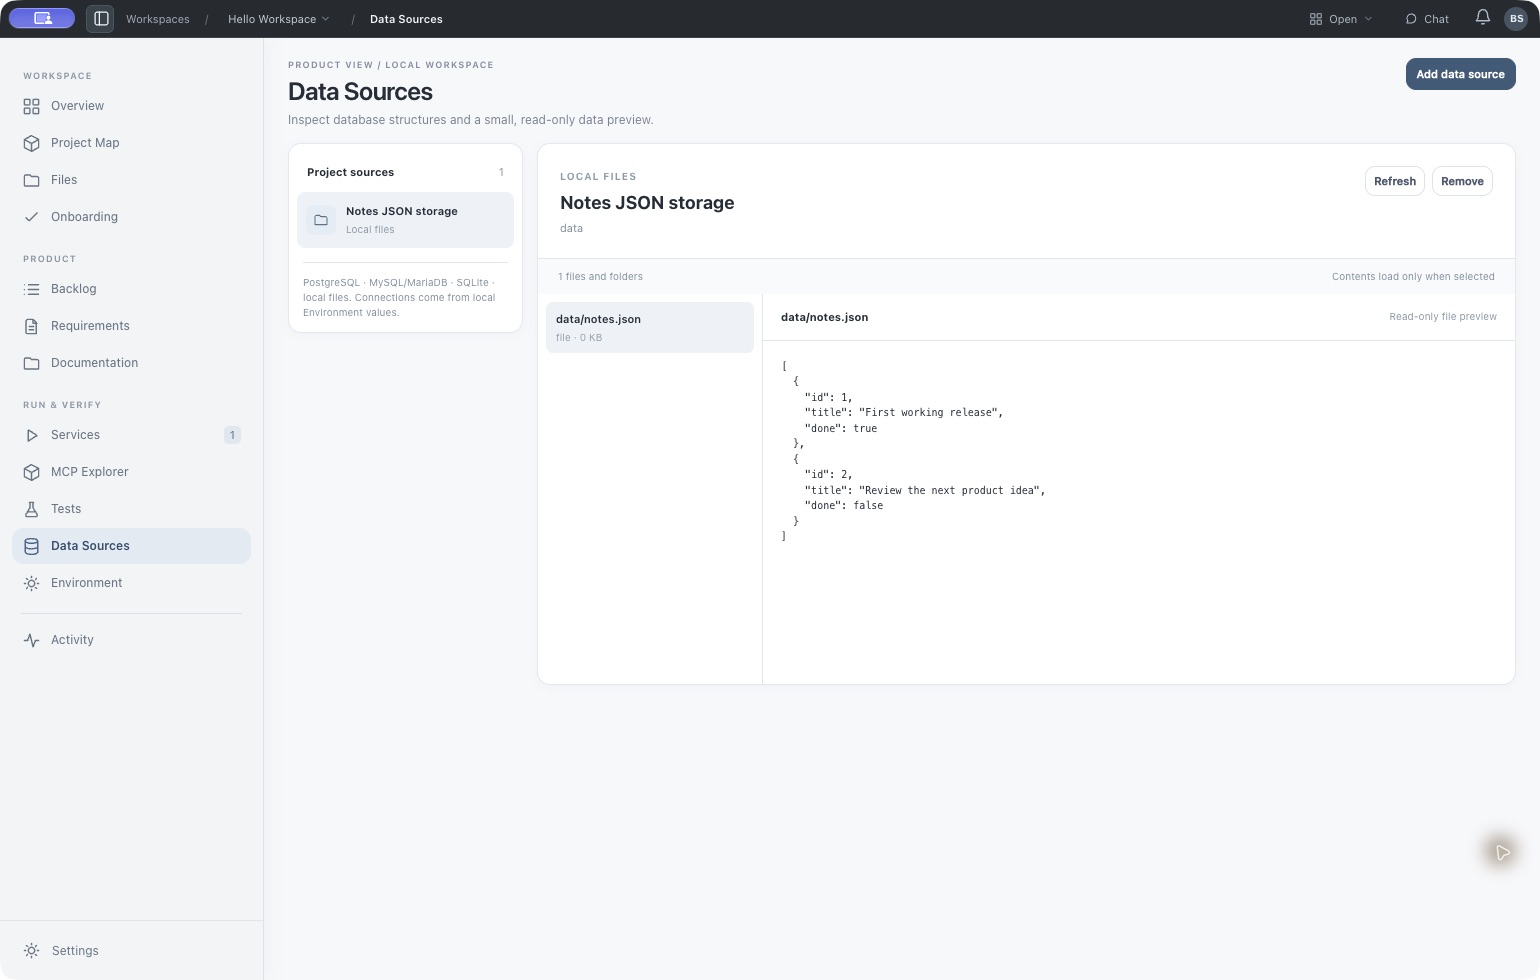
Try the same project in five minutes. No cloud account, database server, or secret is needed. Node.js 20+ runs the example service and tests.
Download and try it View example sourceFOR PRODUCT OWNERS
Keep the why, the next steps, and the evidence together in the repository. Your coding agent works from the same product context that you can inspect in OpenBuildRoom.
Return to one dashboard for declared services, recent tests, open work, and progress read from Spec Kit tasks.
Write the product purpose in a Markdown document the team and agent can revisit. Enable this view when you have a vision to show.
Turn product milestones into a shared plan. Link them to components and show their declared status as the work moves forward.
Choose one product outcome, set a target, and record observations over time. The prototype plots values entered by the team.
Capture requests as Markdown issues with status and priority, then link them to specs. GitHub and Linear can be referenced; live sync is still planned.
Read and edit product documentation in the project folder. Keep decisions and onboarding notes alongside specifications and code.
Vision, Roadmap, and North Star are optional views. Add them through workspace settings or productview.yaml when the project has real content.
RUN & VERIFY
Go from product progress to the running system. Inspect the services, tests, tools, data, and files behind each release.
Available in the desktop prototype / Interface previews illustrate the workflow. Planned capabilities are marked.
See the real services, databases, storage, and persistent processes that make up your local system.
Start and stop configured local services, check their state and ports, and read the output when something fails.
Run a suite or individual discovered tests and inspect the result and output without hunting for commands.
Connect project MCP servers, browse their tools, resources, and prompts, then try a tool deliberately.
Discover local command-line tools, read their commands and options like a friendly manual, and run trials.
Collect every configured project source in one place. Inspect supported databases and local files with limited, read-only previews.
See every variable declared for the workspace and its components. Set encrypted local values without putting secrets in YAML or Product Chat.
Read existing specs, plans, tasks, and project rules; follow the progress of work stored with the code.
Switch local repositories and browse their source trees, with folders collapsed until you open them.
Ask a local coding agent about the project, its tools, and next steps. Type or dictate in the desktop app.
See recorded starts, test runs, agent connections, and project changes so the next session has context.
Historical resource trends for local services and workspaces are planned. The prototype currently shows service state and output.
THE PROBLEM
What outcome are we building toward?
Which feature is next, and why?
What did the agent actually finish?
Do the app, tests, and data support the claim?
A product owner needs a view across decisions and delivery. OpenBuildRoom keeps product direction, Spec Kit work, and the local system together, so you can steer the agent and return later without reconstructing the project from old chats and shell history.
THE LOCAL CONTROL ROOM
Switch between local repositories and find the same starting points each time. OpenBuildRoom sits beside your editor, terminal, and cloud deployment dashboard.
Bring vision, roadmap, outcome, backlog, Spec Kit requirements, and documentation into the same workspace the agent uses.
See configured services, commands, ports, and required environment variable names. Start and stop local processes, check status, and read output.
Run tests, inspect local data sources with limited read-only previews, and review activity as the product changes over time.
You set the product direction. Your agent builds.
OpenBuildRoom lets you follow the work and verify the software.
A DISCIPLINED BUILDING LOOP
Give the agent durable product context. GitHub Spec Kit structures requirements, plans, and tasks. OpenBuildRoom reads that work alongside the running system so each iteration can be reviewed.
Describe the users, problem, vision, next milestone, and desired outcome. Keep product documents and backlog items in the repository so the agent can refer to them later.
Ask Codex or Claude Code to use GitHub Spec Kit for project rules, feature specs, technical plans, and tasks. OpenBuildRoom reads those existing files.
Have the agent inspect real commands and propose productview.yaml with services, tests, data sources, and verified links to requirements. Review the configuration.
Start services, inspect logs and data, and run tests. Update roadmap status and documentation when behavior changes; commit the shared setup for the next session.
HOW TO INSTALL & START
Start with a brief for your coding agent. Put product direction and structured delivery in the repository, then open it in OpenBuildRoom to follow the work.
Download the Apple Silicon macOS preview. Unzip it, move the app to Applications, and open it. This preview is unsigned and not notarized.
Download for macOS Apple Silicon · 0.9.45Click Try working example in the app. Start its service, run the tests, and inspect its data and Spec Kit feature. Node.js 20+ is needed for the example commands.
Open the agent guide and YAML schema in the public repository, then give the link and the short prompt to Codex or Claude Code. The agent can read the contract and set up your project.
After the agent has created and checked productview.yaml, choose the repository folder in the desktop app. Review product direction, specs, map, services, tests, and data sources.
Fill in your idea and paste this into Codex or Claude Code.
Build [my app idea] for [my audience] with Git, GitHub Spec Kit, and OpenBuildRoom Desktop: https://github.com/OpenBuildRoom/desktop

Read its agent guide and YAML schema, ask me the essentials, and set up the repository so I can open it in the desktop app.
Open source on GitHub: OpenBuildRoom/desktop ↗ · MIT licensed.
A CONCRETE EXAMPLE
This is the part your team commits with the code. It points OpenBuildRoom to product documents, existing Spec Kit files, and verified local commands. It does not copy your application into another platform.
Keep direction visible. Vision, roadmap, and North Star sit in the repository and appear as optional product views.
Start the app. The service card runs the command declared in the repository.
Check the work. The suite appears on the Tests page with its actual command one click away.
Keep secrets local. The YAML names DATABASE_URL; each developer sets the value on their own machine.
schemaVersion: 1
project:
  id: atlas
  name: Atlas

workspace:
  additionalViews: [vision, roadmap, north-star]

product:
  vision: docs/vision.md
  docsRoot: docs
  roadmap:
    - id: launch
      title: First usable release
      status: in-progress
  documentation: []
  northStar:
    name: Weekly active teams
    unit: teams
    cadence: weekly
    target: 100
    measurements: []

views:
  specifications:
    roots: [specs]

components:
  - id: web
    kind: service
    name: Web app
    position: { x: 15, y: 80 }
    runtime:
      command: [npm, run, dev]
      cwd: .
      port: 3000
      startup: manual

  - id: database
    kind: database
    name: PostgreSQL
    position: { x: 70, y: 80 }
    data:
      engine: postgres
      connectionEnv: DATABASE_URL

  - id: tests
    kind: testSuite
    name: Test suite
    position: { x: 15, y: 250 }
    tests:
      command: [npm, test]
      cwd: .

connections:
  - { from: web, to: database, label: uses }
YOUR CODING AGENT, IN CONTEXT
Product Chat connects to a locally installed Codex CLI or Claude Code setup. Talk through a new feature, ask what changed, and let the agent help update specs and project configuration in edit mode. OpenBuildRoom gives you the documents and local runtime to inspect as the work progresses.
Review the agent’s edits before treating the map as accurate. Services and tests run only after you click Start or Run; environment values stay outside the repository.
I’ll draft the spec, plan, and tasks in the repository. Then I’ll propose the related services, data source, and test commands in productview.yaml for your review.
PRODUCT & DEVELOPER QUESTIONS
Keep your vision, backlog, roadmap, North Star definition, and documentation in the repository. OpenBuildRoom shows these beside Spec Kit work and the local app. Vision, Roadmap, and North Star are optional views you enable when they have meaningful content.
No. It gives you a reliable entry point into the same local repository. Configured commands still run as real local processes, and the source stays in your editor.
It can discover some project structure and tools. A coding agent can help draft the configuration, but you verify the commands, dependencies, and data sources before using them.
They stay in the repository. OpenBuildRoom reads existing .specify/ and specs/ artifacts, then lets you link verified requirements to components and test suites.
Each repository keeps its own productview.yaml and product documents. The desktop app lets you switch local workspaces, so each project has a familiar place for its setup, tests, data, and activity.
OpenBuildRoom focuses on the local development system. Your cloud platform still handles deployment and hosted operations. Direct Railway deployment is a future direction, not a feature of the current prototype.
WHERE IT STANDS
OpenBuildRoom Desktop runs locally on macOS. The first Apple Silicon preview is available for download, alongside its source and agent guide.
OPENBUILDROOM
A clear framework for the work, and a local control room for the software that grows from it.
Get started